Linux on SMARC-T437X
The main purpose of this document is to help developers understand the overall software layout structure and enable them to compile each part of the software separately. It provides instructions for advanced users how Embedian offers patches and builds a customized version of u-boot and linux kernel for Embedian’s SMARC-T437X platform and how to install the images to bring the evaluation board up and running. It is very helpful for gaining a better understanding of the entire system.
The host Linux machine is recommended Ubuntu 16.04.
Once you have Ubuntu 16.04 LTS running, install the additional required support packages using the following console command:
$ sudo apt-get install gawk wget git-core diffstat unzip texinfo build-essential chrpath libsdl1.2-dev xterm python python-m2crypto bc dos2unix socat libsdl1.2-dev -y
Availability
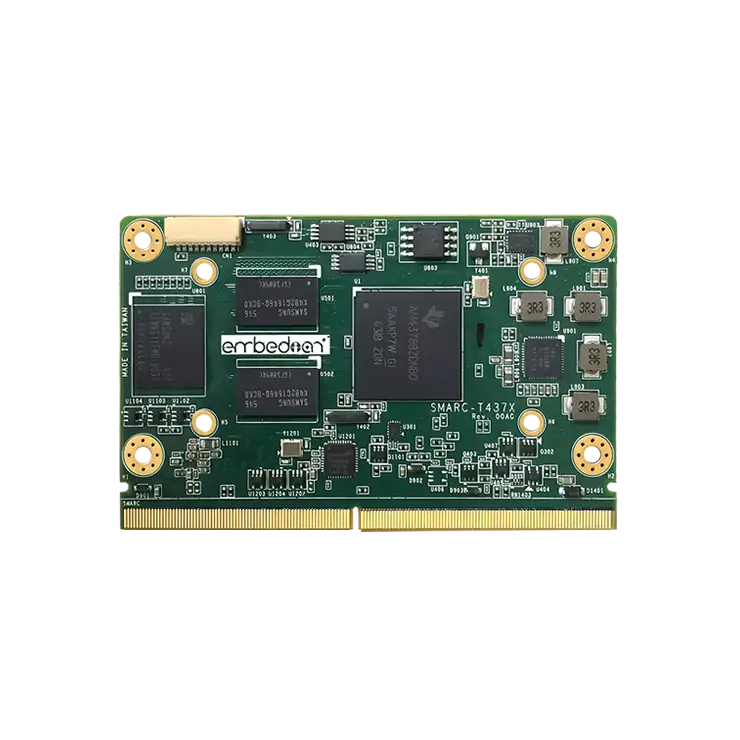
SMARC-T4378 at Embedian.
Carrier Board
EVK-STD-CARRIER-S20 (universal carrier board for all SMARC 1.1 and 2.0 modules) at Embedian.
Basic Resources
- ARM Cross Compiler
- Linaro: https://launchpad.net/linaro-toolchain-binaries
- Bootloader
- Das U-Boot – the Universal Boot Loader http://www.denx.de/wiki/U-Boot
- Source – http://git.denx.de/?p=u-boot.git;a=summary
- Linux Kernel
- Linus’s Mainline tree: http://git.kernel.org/?p=linux/kernel/git/torvalds/linux.git;a=summary
- TI Linux source tree: http://git.ti.com/git/ti-linux-kernel/ti-linux-kernel.git
- TI’s overall Processor SDK build and test process: http://arago-project.org/git/projects/tisdk-build-scripts.git
- Embedian SMARC-T4378 Linux kernel source tree: https://github.com/embedian/smarc-fsl-linux-kernel.git
ARM Cross Compiler: GCC
To build Embedian’s SMARC-T4378 u-boot and linux kernel, you will need to install the following ARM compiler:
For u-boot 2017.04 and Linux kernel 4.9.41 (paired by TI Processor SDK 04.01.00.06 release), you need to use the following Arm compiler.
$ wget -c http://releases.linaro.org/components/toolchain/binaries/6.2-2016.11/arm-linux-gnueabihf/gcc-linaro-6.2.1-2016.11-x86_64_arm-linux-gnueabihf.tar.xz
$ sudo tar -C /opt -xJf gcc-linaro-6.2.1-2016.11-x86_64_arm-linux-gnueabihf.tar.xz
$ export CC=/opt/gcc-linaro-6.2.1-2016.11-x86_64_arm-linux-gnueabihf/bin/arm-linux-gnueabihf-
Test:
$ ${CC}gcc --version
Copyright (C) 2016 Free Software Foundation, Inc.
This is free software; see the source for copying conditions. There is NO
warranty; not even for MERCHANTABILITY or FITNESS FOR A PARTICULAR PURPOSE.
Bootloader: U-Boot
The boot file is called u-boot.imx. Clone the U-Boot source code from Embedian Guthub Server.
For u-boot 2017.01 and Linux kernel 4.9.41 (Paired from TI Processor SDK 04.01.00.06 release)
Download:
For u-boot v2017.01: (Paired from TI Processor SDK 04.01.00.06 release)
$ git clone https://github.com/embedian/smarc-uboot.git v2017.01 -b v2017.01-smarct4x
Configure and Build:
$ make ARCH=arm CROSS_COMPILE=${CC} distclean
$ make ARCH=arm CROSS_COMPILE=${CC} smarct437x_evm_spi_uart3_defconfig
$ make ARCH=arm CROSS_COMPILE=${CC}
Notes
Note 1:
1. If users use other uart ports as their debug port, simply change uart3 to other index.
2. The SMARC-T4378 module always boot up from the onboard SPI NOR flash. The factory default will be MLO.byteswap and u-boot.img pre-installed. In some cases when the SPI NOR flash is empty or needs to be upgraded. Users can shunt crossed the TEST# to ground. In this way, the SMARC-T4378 module will boot up to carrier SD card. If TEST# pin is shunt crossed to ground, the config will be:$ make ARCH=arm CROSS_COMPILE=${CC} smarct437x_spi_uart3_defconfig
Please see “Setup SD card” section for more details.
Linux Kernel
Download:
For Linux Kernel v4.9.41 (Paired from TI Processor SDK 04.01.00.06 release)
$ git clone https://github.com/embedian/smarc-ti-linux-kernel.git v4.9.41 -b smarct4x-processor-sdk-04.01.00.06
Configure and Build:
$ make ARCH=arm CROSS_COMPILE=${CC} distclean
$ make ARCH=arm CROSS_COMPILE=${CC} smarct437x_defconfig
$ make ARCH=arm CROSS_COMPILE=${CC} zImage modules am437x-smarct437x.dtb
All available DTB files are listed in the table below.
DTB FILENAME | DESCRIPTION |
am437x-smarct437x.dtb | Device tree binary for SMARC-T437X |
Root File System
Ubuntu 16.04 Xenial:
$ wget -c ftp://ftp.embedian.com/public/dev/minfs/ubuntu/xenial/am-ubuntu-16.04.2-armhf-2017-03-02.tar.gz
Verify:
$ md5sum am-ubuntu-16.04.2-armhf-2017-03-02.tar.gz
c6f1a6b72fb4e3373f2f62d73078bb8d am-ubuntu-16.04.2-armhf-2017-03-02.tar.gz
Debian 11 Bullseye:
USERNAME | PASSWORD |
root | root |
debian | temppwd |
Debian 11 Bullseye Download:
$ wget -c ftp://ftp.embedian.com/public/dev/minfs/debian/bullseye/am-debian-11.5-minimal-armhf-2022-10-06.tar.gz
Verify:
$ md5sum am-debian-11.5-minimal-armhf-2022-10-06.tar.gz
0749b64bb8b87a5d2f2459081b10e73c am-debian-11.5-minimal-armhf-2022-10-06.tar.gz
Yocto Morty (TI Processor SDK 04.01.00.06):
USERNAME | PASSWORD |
root | N/A |
Yocto Morty Download:
$ wget -c ftp://ftp.embedian.com/public/dev/minfs/dev/minfs/morty/smarct437x-rootfs-image-smarct437x.tar.xz
Verify:
$ md5sum smarct437x-rootfs-image-smarct437x.tar.xz
fcf8bae9cf915fd8a880ad3aaf06766b smarct437x-rootfs-image-smarct437x.tar.xz
Setup SD Card
For these instruction, we are assuming: DISK=/dev/mmcblk0, “lsblk” is very useful for determining the device id.
$ export DISK=/dev/mmcblk0
Erase SD card:
$ sudo dd if=/dev/zero of=${DISK} bs=1M count=160
Create Partition Layout: Leave 1MB offset for boot file. With util-linux v2.26, sfdisk was rewritten and is now based on libfdisk.
(sfdisk) $ sudo sfdisk --versionsfdisk from util-linux 2.34
Create Partitions:
(sfdisk >=2.26.x) $ sudo sfdisk ${DISK} <<-__EOF__
1M,48M,0x83,*
,,,-
__EOF__
(sfdisk <=2.25) $ sudo sfdisk --in-order --Linux --unit M ${DISK} <<-__EOF__1,48,0xE,*,,,-
__EOF__
Format Partitions:
for: DISK=/dev/mmcblk0$ sudo mkfs.vfat -F 16 ${DISK}p1 -n boot$ sudo mkfs.ext4 ${DISK}p2 -L rootfs
for: DISK=/dev/sdX$ sudo mkfs.vfat -F 16 ${DISK}1 -n boot$ sudo mkfs.ext4 ${DISK}2 -L rootfs
Mount Partitions:
On some systems, these partitions may be auto-mounted…
$ sudo mkdir -p /media/boot/$ sudo mkdir -p /media/rootfs/
for: DISK=/dev/mmcblk0$ sudo mount ${DISK}p1 /media/boot/$ sudo mount ${DISK}p2 /media/rootfs/
for: DISK=/dev/sdX$ sudo mount ${DISK}1 /media/boot/$ sudo mount ${DISK}2 /media/rootfs/
Install Bootloader
The MLO.byteswap and u-boot.img is pre-installed in SPI NOR flash at factory default. SMARC-T4378 is designed to always boot u-boot from SPI NOR flash and to load zImage and root file systems based on the setting of BOOT_SEL. If users need to fuse their own u-boot or perform u-boot upgrade. This section will instruct you how to do that.
Copy MLO.byteswap and u-boot.imx to the first boot partition of your SD card.
<u-boot source directory>
$ sudo cp -v MLO.byteswap /media/boot/
$ sudo cp -v u-boot.img /media/boot/spi-u-boot.img
To write MLO.byteswap and u-boot.img to the SPI NOR flash.
Stop at U-Boot command prompt (Press any key when booting up). Copy and Paste the following script under u-boot command prompt.
U-Boot Command Prompt
U-Boot# sf probe
U-Boot# sf erase 0 400000
U-Boot# mmc rescan
U-Boot# fatload mmc 0 ${loadaddr} MLO.byteswap
U-Boot# sf write ${loadaddr} 0 ${filesize}
U-Boot# fatload mmc 0 ${loadaddr} spi-u-boot.imgU-Boot# sf write ${loadaddr} 0x20000 ${filesize}
Notes
MLO.byteswap and u-boot.img are generated from u-boot smarct437x_evm_spi_uart3_defconfig
In some cases, when SPI NOR flash is erased or the u-boot is under development, we need a way to boot from SD card first. Users need to shunt cross the TEST# pin to ground. In this way, SMARC-T437X will always boot up from SD card.
Copy MLO and u-boot.img to the boot partition
Write u-boot.imx to the SD card boot partition.
<u-boot souirce directory>
$ sudo cp -v MLO /media/boot/
$ sudo cp -v u-boot.img /media/boot/
Notes
1. MLO and u-boot.img are generated from u-boot smarct437x_evm_uart3_defconfig.
If your u-boot hasn’t been finalized and still under development, it is recommended to shunt cross the TEST# pin and boot directly from SD card first. Once your u-boot is fully tested and finalized, you can make smarct437x_evm_spi_uart3_defconfig again write your u-boot to SPI NOR flash.
2. If your u-boot hasn’t been finalized and still under development, it is recommended to shunt cross the test pin and boot directly from SD card first (shunt cross TEST# to GND). Once your u-boot is fully tested and finalized, you can write your u-boot file to SPI NOR flash.
3. When TEST# pin of SMARC-T437X is not shunt crossed, it will always boot up from on-module SPI NOR flash. U-boot will read the BOOT_SEL configuration and determine where it should load Image and device tree blob. When TEST# is shunt crossed (pull low), it will always boot up from SD card.
Install uEnv.txt based bootscript
Create “uEnv.txt” boot script: ($ vim uEnv.txt)
~/uEnv.txt
optargs=”consoleblank=0 mem=512M”
#u-boot eMMC specific overrides; Angstrom Distribution (SMARC-T437X) 2014-05-20
kernel_file=zImage
initrd_file=initrd.img
loadaddr=0x82000000
initrd_addr=0x88080000
fdtaddr=0x88000000
fdtfile=am437x-smarct437x.dtb
initrd_high=0xffffffff
fdt_high=0xffffffff
loadimage=load mmc ${mmcdev}:${mmcpart} ${loadaddr} ${kernel_file}
loadinitrd=load mmc ${mmcdev}:${mmcpart} ${initrd_addr} ${initrd_file}; setenv initrd_size ${filesize}
loadfdt=load mmc ${mmcdev}:${mmcpart} ${fdtaddr} /dtbs/${fdtfile}
#
##Un-comment to enable systemd in Debian Wheezy
#optargs=quiet init=/lib/systemd/systemd
console=ttyS4,115200n8
mmcroot=/dev/mmcblk1p2 ro
mmcrootfstype=ext4 rootwait fixrtc
mmcargs=setenv bootargs console=${console} root=${mmcroot} rootfstype=${mmcrootfstype} ${optargs}
#zImage:
uenvcmd=run loadimage; run loadfdt; run mmcargs; bootz ${loadaddr} – ${fdtaddr}
#zImage + uInitrd: where uInitrd has to be generated on the running system.
#boot_fdt=run loadimage; run loadinitrd; run loadfdt
#uenvcmd=run boot_fdt; run mmcargs; bootz ${loadaddr} ${initrd_addr}:${initrd_size} ${fdtaddr}
###Begin Rootfs from NFS
#serverip=192.168.1.51
#rootpath=/srv/nfs/smarct335x/ubuntu1204/
#nfsopts=nolock,acdirmin=60
#netargs=setenv bootargs console=${console} ${optargs} root=/dev/nfs nfsroot=${serverip}:${rootpath},${nfsopts} rw ip=dhcp
##netboot=echo Loading kernel from SDCARD and booting from NFS …; run loadimage; run netargs; bootz ${loadaddr} – ${fdtaddr}
##uenvcmd=run netboot
###End Rootfs from NFS
###Begin Load kernel from TFTP
#netmask=255.255.255.0
#ipaddr=192.168.1.65
#serverip=192.168.1.51
#netboot=echo Loading kernel and device tree from TFTP and booting from NFS …; setenv autoload no; tftp ${loadaddr} ${kernel_file}; tftp ${fdtaddr} ${fdtfile}; run netargs; bootz ${loadaddr} – ${fdtaddr}
#uenvcmd=run netboot
###End Load kernel from TFTP
Notes
1. If you use SMARC-T4378-800, mem=512M in optargs. Otherwise, mem has to change to 1024M in optargs.
Copy uEnv.txt to the boot partition:
~/
$ sudo cp -v ~/uEnv.txt /media/boot/
Install Linux Kernel zImage
Copy zImage to the boot partition:
<linux kernel source directory>
$ sudo cp -v arch/arm/boot/zImage /media/boot/
Install Linux Kernel Device Tree Binary
<linux kernel source directory>
$ sudo mkdir -p /media/boot/dtbs
$ sudo cp -v arch/arm/boot/dts/am437x-smarct437x.dtb /media/boot/dtbs/am437x-smarct437x.dtb
All available DTB binary files are listed in the table below.
DTB FILENAME | DESCRIPTION |
am437x-smarct437x.dtb | Device tree binary for SMARC-T437X |
Install Root Filesystem
Extract root filesystem to your SD card
~/<directory where your rootfs is>/
$ sudo tar jxvf <filename.tar.bz2> -C /media/rootfs
~/<directory where your rootfs is>/
$ sudo tar xvfz <filename.tar.gz> -C /media/rootfs
Install Kernel Modules
~/<Linux kernel source directory>/
$ sudo make ARCH=arm CROSS_COMPILE=${CC} INSTALL_MOD_PATH=/media/rootfs modules_install
Notes
1. SMARC-T437X boots up from SD card or on-module SPI NOR flash depending on if TEST# pin shunt cross to ground.
2. MAC address is factory pre-installed at on board I2C EEPROM at offset 60 bytes. It starts with Embedian’s vendor code 10:0D:32. u-boot will read it and pass this parameter to kernel.
3. The kernel modules is already included in the rootfs.
Remove SD card:
$ sync
$ sudo umount /media/boot
$ sudo umount /media/rootfs
Setup eMMC
Setting up eMMC usually is the last step at development stage after the development work is done at your SD card or NFS environments. From software point of view, eMMC is nothing but a non-removable SD card on board. For SMARC-T437X, the SD card is always emulated as /dev/mmcblk1 and on-module eMMC is always emulated as /dev/mmcblk0. Setting up eMMC now is nothing but changing the device descriptor.
This section gives a step-by-step procedure to setup eMMC flash. Users can write a shell script your own at production to simplify the steps.
First, we need to backup the final firmware from your SD card or NFS.
Prepare for eMMC binaries from SD card (or NFS):
Insert SD card into your Linux PC. For these instructions, we are assuming: DISK=/dev/mmcblk0, “lsblk” is very useful for determining the device id.
For these instruction, we are assuming: DISK=/dev/mmcblk0, “lsblk” is very useful for determining the device id.
$ export DISK=/dev/mmcblk0
Mount Partitions:
On some systems, these partitions may be auto-mounted…
$ sudo mkdir -p /media/boot/
$ sudo mkdir -p /media/rootfs/
for: DISK=/dev/mmcblk0
$ sudo mount ${DISK}p1 /media/boot/
$ sudo mount ${DISK}p2 /media/rootfs/
for: DISK=/dev/sdX
$ sudo mount ${DISK}1 /media/boot/
$ sudo mount ${DISK}2 /media/rootfs/
Copy MLO to rootfs partition
<u-boot source directory>
$ sudo cp -v MLO /media/rootfs/home/root
Copy u-boot.img to rootfs partition
<u-boot source directory>
$ sudo cp -v u-boot.img /media/rootfs/home/root
Copy zImage to rootfs partition
<kernel source directory>
$ sudo cp -v zImage /media/rootfs/home/root
Copy uEnv.txt to rootfs partition
Copy and paste the following contents to /media/rootfs/home/root ($ sudo vim /media/rootfs/home/root/uEnv.txt)
~/uEnv.txt
optargs=”consoleblank=0 mem=512M”
#u-boot eMMC specific overrides; Angstrom Distribution (SMARC-T437X) 2014-05-20
kernel_file=zImage
initrd_file=initrd.img
loadaddr=0x82000000
initrd_addr=0x88080000
fdtaddr=0x88000000
fdtfile=am437x-smarct437x.dtb
initrd_high=0xffffffff
fdt_high=0xffffffff
loadimage=load mmc ${mmcdev}:${mmcpart} ${loadaddr} ${kernel_file}
loadinitrd=load mmc ${mmcdev}:${mmcpart} ${initrd_addr} ${initrd_file}; setenv initrd_size ${filesize}
loadfdt=load mmc ${mmcdev}:${mmcpart} ${fdtaddr} /dtbs/${fdtfile}
#
##Un-comment to enable systemd in Debian Wheezy
#optargs=quiet init=/lib/systemd/systemd
console=ttyS4,115200n8
mmcroot=/dev/mmcblk0p2 ro
mmcrootfstype=ext4 rootwait fixrtc
mmcargs=setenv bootargs console=${console} root=${mmcroot} rootfstype=${mmcrootfstype} ${optargs}
#zImage:
uenvcmd=run loadimage; run loadfdt; run mmcargs; bootz ${loadaddr} – ${fdtaddr}
#zImage + uInitrd: where uInitrd has to be generated on the running system.
#boot_fdt=run loadimage; run loadinitrd; run loadfdt
#uenvcmd=run boot_fdt; run mmcargs; bootz ${loadaddr} ${initrd_addr}:${initrd_size} ${fdtaddr}
###Begin Rootfs from NFS
#serverip=192.168.1.51
#rootpath=/srv/nfs/smarct335x/ubuntu1204/
#nfsopts=nolock,acdirmin=60
#netargs=setenv bootargs console=${console} ${optargs} root=/dev/nfs nfsroot=${serverip}:${rootpath},${nfsopts} rw ip=dhcp
##netboot=echo Loading kernel from SDCARD and booting from NFS …; run loadimage; run netargs; bootz ${loadaddr} – ${fdtaddr}
##uenvcmd=run netboot
###End Rootfs from NFS
###Begin Load kernel from TFTP
#netmask=255.255.255.0
#ipaddr=192.168.1.65
#serverip=192.168.1.51
#netboot=echo Loading kernel and device tree from TFTP and booting from NFS …; setenv autoload no; tftp ${loadaddr} ${kernel_file}; tftp ${fdtaddr} ${fdtfile}; run netargs; bootz ${loadaddr} – ${fdtaddr}
#uenvcmd=run netboot
###End Load kernel from TFTP
Copy device tree binary to rootfs partition
<kernel source directory>
$ sudo cp -v /media/boot/dtbs/am437x-smarct437x.dtb /media/rootfs/home/root/am437x-smarct437x.dtb
Copy final root file system to rootfs partition
$ pushd /media/rootfs$ sudo tar cvfz ~/smarct437x-emmc-rootfs.tar.gz .$ sudo mv ~/smarct437x-emmc-rootfs.tar.gz /media/rootfs/home/root$ popd
Remove SD card:
$ sync
$ sudo umount /media/boot
$ sudo umount /media/
Copy Binaries to eMMC from SD card
Insert this SD card into your SMARC-T437X device.
Now it will be almost the same as you did when setup your SD card, but the eMMC device descriptor is /dev/mmcblk0 now. Booting up the device from SD card (shunt cross TEST#).
$ export DISK=/dev/mmcblk0
Erase eMMC:
$ sudo dd if=/dev/zero of=${DISK} bs=1M count=160
Create Partition Layout:
$ sudo sfdisk --in-order --Linux --unit M ${DISK} <<-__EOF__1,48,0x83,*,,,-__EOF__
Format Partitions:
$ sudo mkfs.vfat -F 16 ${DISK}p1 -n boot
$ sudo mkfs.ext4 ${DISK}p2 -L rootfs
Mount Partitions:
$ sudo mkdir -p /media/boot/
$ sudo mkdir -p /media/rootfs/
$ sudo mount ${DISK}p1 /media/boot/
$ sudo mount ${DISK}p2 /media/rootfs/
Copy binaries to boot partition
Copy uEnv.txt/Image/*.dtb to the boot partition
$ sudo cp -v zImage uEnv.txt /media/boot/
Copy Linux kernel device tree binary
$ sudo mkdir -p /media/boot/dtbs
$ sudo cp -v am437x-smarct437x.dtb /media/boot/dtbs/
Copy root file system to rootfs partition
$ sudo tar -zxvf smarct437x-emmc-rootfs.tar.gz -C /media/rootfs
Unmount eMMC:
$ sync
$ sudo umount /media/boot
$ sudo umount /media/rootfs
Switch your Boot Select to eMMC (OFF ON ON) and you will be able to boot up from eMMC now.
version 1.0a, 10/28/2024
Last updated 2024-10-28